Forget everything you think you know about pickles. These aren’t your grandmother’s quick refrigerator pickles or those mushy store-bought specimens that taste more like vinegar than vegetables. We’re talking about real-deal fermented spicy garlic dill pickles that develop their incredible tangy complexity through the ancient art of lacto-fermentation. The kind that makes your mouth water just thinking about that perfect crunch and the way the heat builds slowly on your tongue.
What makes these pickles absolutely irresistible is the living culture that develops during fermentation. Unlike vinegar-based pickles that rely on acetic acid for preservation, these beauties create their own natural acids through beneficial bacteria. The result? A deeper, more complex flavor that’s both tangy and slightly effervescent, with layers of taste that unfold with each bite. Plus, you get all the gut-healthy probiotics as a bonus.
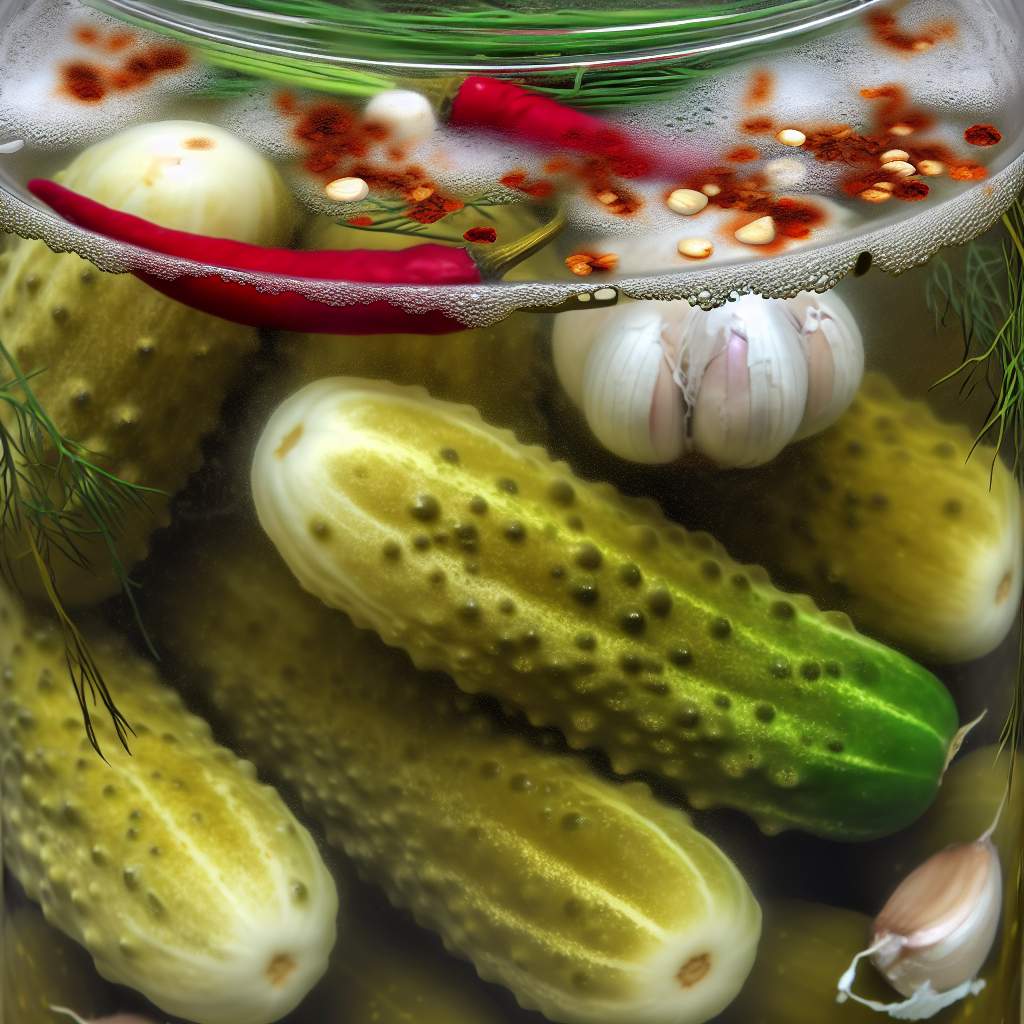
Fermented Spicy Garlic Dill Pickles
Fermentation Time:
Yield: 1 quart jar
Ingredients
- 2 pounds small to medium cucumbers (kirby or pickling cucumbers work best)
- 4 tablespoons sea salt (non-iodized)
- 4 cups filtered water
- 6-8 garlic cloves, peeled and smashed
- 3-4 large sprigs fresh dill (or 2 tablespoons dill seeds)
- 2-3 dried red chilies or 1-2 fresh jalapeños, sliced
- 1 tablespoon black peppercorns
- 2 bay leaves
- 1 tablespoon coriander seeds (optional)
- 1-2 grape leaves or horseradish leaves (for crispness, optional)
Instructions
Step 1: Prepare Your Cucumbers
Wash your cucumbers thoroughly and trim off the blossom end completely – this is crucial for maintaining crispness. Cut them into spears, chips, or leave small ones whole. The key is ensuring all pieces are roughly the same size for even fermentation.
Step 2: Create Your Brine
Dissolve the sea salt in filtered water to create a 3% brine solution. This concentration is perfect for encouraging good bacteria while inhibiting harmful microorganisms. Never use tap water with chlorine, as it will kill the beneficial bacteria needed for fermentation.
Step 3: Layer Your Flavors
In a clean quart-sized mason jar, layer the bottom with garlic cloves, dill, chilies, peppercorns, bay leaves, and coriander seeds. Add the grape leaves if using – they contain tannins that help maintain crispness. Pack your cucumber pieces tightly into the jar, leaving about an inch of headspace.
Step 4: Add the Brine
Pour the salt brine over the cucumbers, ensuring they’re completely submerged. This is critical – any vegetables exposed to air can develop mold. Use a fermentation weight or a small glass jar to keep everything below the brine line.
Step 5: Begin Fermentation
Cover the jar with a loose lid or cloth secured with a rubber band. The fermentation process produces gas, so you need to allow it to escape. Place the jar at room temperature, away from direct sunlight. The ideal temperature range is 65-75°F.
Step 6: Monitor and Wait
Within 24-48 hours, you should see bubbles forming and the brine becoming cloudy – this is exactly what you want! Taste daily after day 3. The pickles are ready when they reach your desired level of sourness and have that characteristic fermented tang.
The magic happens during those first few days when wild lactobacillus bacteria naturally present on the cucumber skins begin converting sugars into lactic acid. This creates that distinctive sour flavor while simultaneously preserving the vegetables. The garlic mellows and becomes sweet, the dill infuses throughout, and the chilies provide a building heat that’s perfectly balanced by the cooling effect of the fermentation.
What sets these fermented pickles apart from quick pickles is the depth of flavor and the incredible crunch that develops. The fermentation process actually strengthens the cell walls of the cucumbers, creating that satisfying snap that store-bought pickles simply can’t match. The probiotics produced during fermentation also provide digestive benefits that you won’t get from vinegar-based pickles.
Once your pickles reach peak flavor (usually 5-7 days), transfer them to the refrigerator where they’ll keep for several months. The cold temperature slows down fermentation significantly, allowing you to enjoy them at their perfect sourness level. The flavors will continue to develop slowly, becoming more complex over time.
Pro tip: Save some of the brine when you finish the pickles. This liquid gold is packed with probiotics and makes an excellent starter for your next batch of fermented vegetables. You can also use it as a cocktail mixer, salad dressing base, or even drink it straight as a probiotic shot. Once you taste these fermented beauties, you’ll never go back to store-bought pickles again.